Images / PRACTICAL GUIDE
FLUX.2: preview armchair upholstery with two reference photos
The chair photo supplies the geometry; the fabric sample supplies the upholstery pattern. Assign roles to the two files and check the details a material change can easily lose.
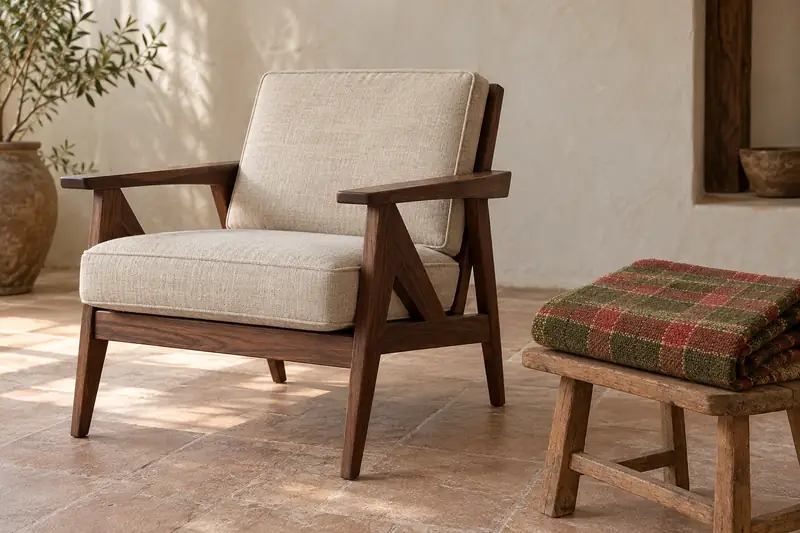
Keep the chair, change the upholstery
The armchair has the right shape, but its pale fabric clashes with the rest of the room. You would like to see it in the green-and-red check from a sample before discussing reupholstery. Give FLUX.2 two files and ask it to make things look nice, and it may bring both the loose swatch and the table it was photographed on into the room. Start by assigning roles: one photo supplies the chair and scene; the other supplies the material.
We will keep the wooden arms and legs, applying the check only to the upholstered seat and backrest. This kind of preview helps compare design options. It cannot establish the actual fabric allowance, the quality of the upholstery work or the material's exact shade in the room's lighting.
Prepare the chair photo and a separate swatch
The chair photo should show clear boundaries between the seat, backrest and wooden frame. Choose an angle that reveals the legs and the transitions between materials. A cushion or throw covering half the seat makes checking harder: you will have to guess what shape the model preserved underneath.
Photograph the fabric close enough to distinguish stripe intersections and the weave. Lay it flat, without a hand, label or strong coloured light. If the check recedes in perspective, the model receives both the pattern and its distortion. Keep the full original and prepare a separate, clearly readable crop for the task.
A pixel count does not tell you the check's physical size. If scale matters, measure the sample and note the distance between matching stripes. This helps assess the visualisation, but it does not turn a text prompt into a precise cutting plan.
Identify references by what they show
Black Forest Labs documents image editing and multiple-reference work for FLUX.2. The family includes different model variants and interfaces; API parameters should not be carried over into a third-party service's input box. This walkthrough needs an available mode that actually accepts both source images.
The YesAI forum guide covers FLUX.2 [klein] 9B, uploading references and choosing settings. It recommends linking a file to the request through its contents: an armchair with wooden arms and a green-and-red checked fabric are clearer descriptions than file 1 and file 2. Follow the link for the service workflow; the prompt below focuses on where the material change should stop.
Before starting, check the selected model and the thumbnails of both attachments. You can prepare the text on YT·DOT, but the link carries only the prompt. Attach the two files separately on the generation page. Use photos and material samples that you are entitled to upload.
Ask for a fabric change without redesigning the furniture
Keep the first request focused: do not change the upholstery, wall colour, camera angle and lighting at once. Otherwise, it becomes hard to tell why the chair looks different. One material and a list of details to preserve are enough.
EXAMPLE PROMPT
Use the photo of the pale armchair with wooden arms as the base scene. The separate swatch shows a green-and-red checked fabric. Transfer its colour combination, check pattern and visible woven texture only to the armchair's upholstered seat and backrest. Keep the wooden arms, legs and frame wooden. Preserve the chair's silhouette, cushion thickness, seam positions, camera angle, background and light direction from the source photo. The checks should follow the upholstery surface and wrap around its volume. Do not add the loose fabric swatch, the stool from the sample photo or other objects to the room.
Check three aspects of the result
First, compare the whole chair with the original. Then zoom in on the seat, the piping around the backrest and the point where upholstery meets wood. Attractive woven texture can easily distract from a leg that has become shorter or an arm that has disappeared behind a new cushion.
Checks have a useful property: straight stripes reveal how a pattern follows a three-dimensional surface. Their apparent direction changes as the surface curves. A break across a flat area, a stripe suddenly splitting in two, or the same flat pattern pasted over differently angled faces deserves a closer look.
- Shape: the number and position of the legs, the outline of the arms, and the seat and backrest thickness are consistent with the source.
- Material boundaries: wood is not covered in checks, fabric has not spread onto the floor or wall, and the pattern has not swallowed the seams.
- Pattern: the check size suits the chair, stripes do not break without a reason, and the weave does not turn into a rigid plastic relief.
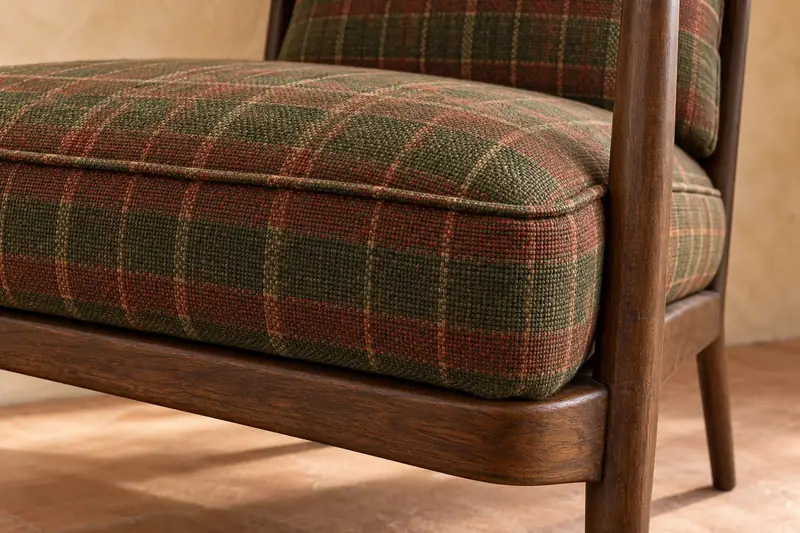
Name the specific mistake
If you like the fabric but the checks have spread onto a wooden arm, name that area. Keep the original pair of files and the main prompt for the next attempt. If the interface can edit a generated result, you can supply the selected image and describe a local correction; check that the interface actually offers this action.
EXAMPLE PROMPT
Clarification: replace the material only on the armchair's upholstered seat and backrest. Keep the original wood on the arms, frame and legs, with no checked pattern. Preserve the chair's existing shape, background and camera angle. Use the same green-and-red fabric as the upholstery reference.
Check the option in its intended layout
A full-screen image and a small card create different impressions. Place the selected option in the layout that prompted the fabric preview. Make sure the checks do not dissolve into visual noise, the chair's outline remains clear and the new fabric does not look like an accidental splash of bright colour.
A fabric's colour in a photo depends on the lighting and image processing. Before placing a real order, hold the physical sample against the chair and look at it under the intended lighting. Keep both source images, the full prompt, the chosen image and a short list of checked details in the project folder. The next fabric preview can then start from a clear decision rather than a search for a lost image that happened to work.